
Introduction
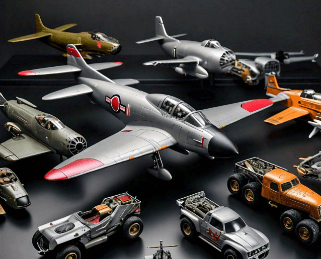
Navigating the world of scale modeling can be daunting, particularly when it comes to understanding different scales and how to transform them for various projects. Whether you’re building a scale model of an aircraft, vehicle, or diorama, ensuring that all components match in scale is crucial for achieving a cohesive look. In this article, we will explore important tips for understanding scales and guide you through the process of converting measurements to fit your modeling needs.
1. Understanding Scales
Scale refers to the ratio of the size of a model to the size of the original object. For example:
- 1/72 Scale: Commonly used for smaller aircraft, meaning the model is 1/72nd the size of the actual plane.
- 1/32 Scale: Typically applied to larger aircraft models, providing a bigger and more detailed representation.
- 1/35 Scale: Often used for armor models, giving a good balance between size and detail.
Different scales can seem confusing, especially when various kits are available in overlapping size categories. For instance, you might encounter a model labeled as 1/24 scale, which is often associated with larger vehicles like cars. Keeping a scale reference chart handy can help modelers quickly identify the dimensions relative to the original objects.
2. Scale Conversion Basics
When working on a project that involves multiple models with differing scales, it’s essential to be able to convert between them accurately. Here’s a simple approach to scale conversion:
Converting Measurements:
- Find the Ratio: Determine the scales you are working with. For example, if you’re converting from a 1/35 scale drawing to a 1/48 scale model.
- Use the Conversion Formula: Divide the scale of the original drawing by the scale you want to convert to. [ \text{Conversion Ratio} = \text{Original Scale} ÷ \text{Desired Scale} ] For our example: [ 35 ÷ 48 = 0.7291666 ]
- Round the Result: Round it to two decimal places for practical use, resulting in 0.73.
- Set the Copier or Scale Tool: If you’re using a copier to prepare drawings, set it to 73% to reduce the size for your model accordingly.

3. Expanding Dimensions
Conversely, if you’re enlarging a model from 1/48 scale to 1/35 scale:
- Calculate the Conversion: [ 48 ÷ 35 = 1.37 ] Round to 137%.
- Adjust Your Tools: Set your copier or scaling tools to enlarge by 137% to reflect the increase in size.

4. Example: Converting Between Common Scales
If you’re working with popular armor model scales, such as 1/35 and 1/76:
- Convert 1/35 to 1/76: [ 35 ÷ 76 = 0.46 ] You can’t go below 50% for practical use, so take the square root of 0.46 to find an appropriate scaling factor.
- Set the Copier: For the realization of a 1/76 scale from a 1/35 model, set the copier to roughly 68% to achieve an accurate scaling of the drawings.
5. Using Scaling Tools
Using a scaling ruler can also aid in manual conversions. This tool displays various scales and allows you to measure and convert directly on the drawing. A calculator comes in handy to perform the necessary mathematical adjustments efficiently.

Conclusion
Understanding and transforming scales in model making is vital for achieving accurate and visually appealing results. By mastering the basic principles of scale conversion and applying the conversion formulas presented, you’ll be better equipped to tackle modeling projects of all types. Whether you’re a seasoned modeler or a beginner, taking the time to learn these techniques will enhance your modeling experience and boost the quality of your builds. Happy modeling!